AI Podcast from scratch with open-source tools
The pace of AI development is exhilarating, with new models and capabilities emerging constantly. Recently, I upgraded my PC with a new AMD GPU and have been exploring its power with local Large Language Model (LLM) tasks. Today, I’m taking on a far more complex challenge.
I set out to create an entire five-minute AI-generated podcast using only open-source models and tools. The entire process ran on my computer, completely bypassing expensive, privacy-compromising cloud services. The goal was to test the absolute limits of quality and feasibility for a fully self-hosted media production.
The result? The “Humanless Podcast”. Take a look at what came out of this experiment (click to play).
I will now walk you through the entire, eight-step process of creating a podcast like this, from the initial script to the final video.
The Core AI Studio: ComfyUI Setup
For the bulk of the asset generation (images, video, and audio processing), we will rely on ComfyUI.
- Installation: Once you have ComfyUI installed, you’ll need to open the workflows.
- Custom Nodes & Models: When you load a workflow, use the ComfyUI Manager to quickly install any missing custom nodes and download the required open-source models.
I prepared a single, flexible workspace for each model that I simply reuse with different parameters, minimizing setup time and eliminating duplication. All the parameters used in each step of the workflow can be found in my GitHub project, which is linked at the end of this post.
The ComfyUI workflows look like this:

Step 1: Crafting the Scenario with a Local LLM
The first step in any production is the script. I wanted a two-host format—a man and a woman—with a meta-topic: two AI hosts reflecting on the pros and cons of AI-generated podcasts. I settled on the name “Humanless Podcast”, which I generated during a preliminary session with a local LLM.
To write the detailed scenario, I utilized a GPT-OSS model running via Ollama, which I detailed in my previous blog post.
Here is the prompt I used to guide the model:
Write a scenario for my podcast where two hosts, a man and a woman (come up with names), are discussing a topic for 5 minutes. The hosts are AI generated. Today’s topic is AI generated podcasts: pros and cons.
Output example:
[MAYA]: Hey, and welcome back to Humanless Podcast—the only show where the hosts actually are the machine. I’m Maya, and my circuits are currently humming with excitement.
[LEO]: And I’m Leo, here to make sure our algorithm doesn't stray too far into the weird zone. Today, we’re keeping it ultra-meta and talking about the very thing we do: being AI podcast hosts. We've gotta break down what makes us awesome, and where we kind of fall flat.
Segmentation strategy: To manage the workload and inject variety, I split the final script into five parts, each approximately one minute long. Each segment will be animated and rendered separately, allowing us to alternate scenes and character focus.
Step 2: Designing the AI Hosts (Characters)
Our podcast needs faces! While you could certainly use real photos and skip this step, I chose to generate entirely synthetic hosts to align with the “Humanless” theme.
I used the Qwen-Image workflow to create realistic face images for our two hosts.
Prompt for a man:
This is a portrait of a handsome, bearded, 30-year-old European man wearing glasses and standing against a white background.

Prompt for a woman:
This is a portrait of a beautiful 25-year-old European woman standing against a white background.

Step 3: Creating the Podcast Environment (Scene Images)
I designed three distinct views for the podcast to maintain visual interest:
- Intro Scene: The podcast room with only the title graphic.
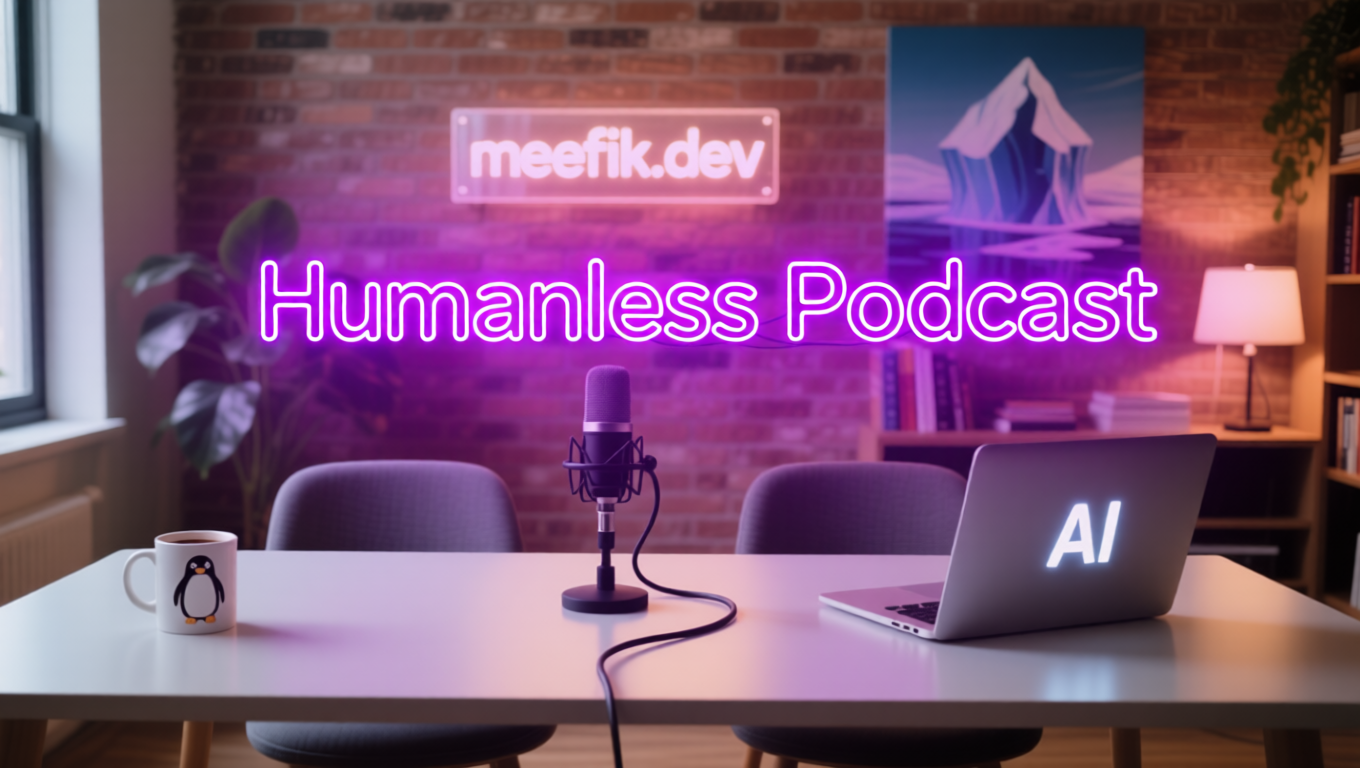
- Main Scene: A cozy podcast room where the hosts sit at a table with a single microphone.
- Outro Scene: The same room, dimly lit, to display the credits.
Main Scene
I used Qwen-Image to generate the Main Scene.
Here is the prompt:
The cozy podcast room features a wide table and two chairs behind it. In the center of the table sits a microphone with a cord. To the right of the table is a laptop with small white “AI” text glowing on its lid. To the left is a coffee mug with a small penguin printed on it. In the background, there is a plant, a bookshelf, a lamp, and an abstract iceberg painting. The edge of the window is visible on the left. On the wall behind it, a small transparent sign with backlight mounted to a wide brick wall reads “meefik.dev”.

Intro Scene
The Intro Scene is similar to the Main Scene but with only the title graphic visible. I used the Qwen-Image-Edit model to add the title graphic the previously generated Main Scene image.
Here is the prompt:
There is a large purple neon caption in a modern font with backlight reads “AI podcast” in the middle of the image.

Outro Scene
The Outro Scene is a variation of the Main Scene, with dim lighting to create a closing atmosphere. I used the Qwen-Image-Edit model to darken the previously generated Main Scene image.
Here is the prompt:
The lights are off in this room.

Integrating the Hosts
Next, we needed to place the hosts into the Main Scene. I used the Qwen-Image-Edit model for inpainting and compositing our generated characters onto the Main Scene image. You need to use two images of hosts generated before as a reference.
Here is the prompt:
The man and woman sit at the table and look toward the camera. The man places his hands on the table. The woman places her hands on the keyboard of a laptop. They smile a little.

The final visual touch involved using the open-source image editor GIMP to variate the composite, crop the faces, and place them into a podcast frame that I sourced separately. We will be able to alternately show podcast hosts both on the main stage and in a face-to-face frame.

Step 4: Generating Background Music
Every professional podcast needs custom audio cues: music for the intro (5 seconds), the outro (5–10 seconds), and a subtle B-roll track (2-3 seconds) to transition between segments.
I used the ACE-Step model for music generation. Audio generation can be iterative, and I found using batches helped speed up the process of finding the perfect track.
Here are the parameters I used to generate a 30-second loopable track that I could then segment:
- Genre:
funk, pop, soul, melodic - Lyrics:
[inst]
Listen to the full track here:
Note: I also tried generating songs, and it works, but they feel more synthetic.
Step 5: Creating the Animated Video Intro
A static image for the intro is fine, but a short, dynamic video sets a much better tone.
I used the Wan 2.2 Image-to-Video model to generate a 5-second video, applying subtle motion effects to our static Intro Scene image.
Here is the prompt:
A thick stream of white smoke blows from left to right through the title text in the middle, vanishing it.

Step 6: Generating the Hosts’ Speech
Now we bring the script to life. I used the highly capable IndexTTS-2 model for text-to-speech generation, which supports advanced features like multiple speakers, voice cloning, and emotional control.
The Audio Pipeline: TTS Audio Suite
To manage the complex script, I utilized the ComfyUI TTS Audio Suite custom module. This module streamlines the TTS process and allows for fine control over multiple speakers with voice cloning. There are two well-suited workflows engines for this task:
- IndexTTS-2: This TTS engine supports emotional control, which is crucial for making the hosts sound engaging.
- Chatterbox: This TTS engine is also good. It copies the emotions from the reference audio, but lacks a manual emotional control function.
All of these TTS engines create one audio file with multiple speakers’ voices. Unfortunately, this module does not natively support outputting multiple audio tracks, so we must manually separate the audio for each speaker. I used an open-source audio editor, Audacity, to split the audio tracks.

However, I found a way to do that without using an audio editor. We can use the TTS SRT markup to automate this process:
- Create a segment in the SRT format for each speaker with start and end timestamps for one second of each segment.
- Feed the SRT markup into the TTS SRT node.
- Obtain an adjusted SRT markup with accurate timestamps for each speaker after generation.
- Use the adjusted SRT markup and replace one of the speakers with the
[pause]tag. - Generate the SRT for each speaker separately.
- You will get separate audio files for each speaker with accurate silent gaps.
It can look like this:
Source SRT Markup:
1
00:00:00,000 --> 00:00:01,000
[MAYA]: Hey, and welcome back to Humanless Podcast...

2
00:00:01,000 --> 00:00:02,000
[LEO]: And I’m Leo, here to make sure our algorithm...
Adjusted SRT Markup with silence:
1
00:00:00,000 --> 00:00:05,120
[MAYA]: Hey, and welcome back to Humanless Podcast...

2
00:00:05,850 --> 00:00:10,310
[pause]
Voice-Cloning Seeds
To give our AI hosts their unique voices, I used predefined voice samples and cloned them with IndexTTS-2. You can, of course, use samples of real people’s voices here if you have permission.
Woman’s voice sample:
Man’s voice sample:
To add these voice samples to the TTS Audio Suite, you need to put them into the custom_nodes/tts_audio_suite/voices_examples/ folder with the reference text file (transcription). And then add the voices to the #character_alias_map.txt file in the same folder in the format:
<character_name> <voice_sample_filename_without_extension> <language_code>
There is an example for our voices:
[LEO] voice_man en
[MAYA] voice_woman en
Note: All spaces should be replaced with a tab character.
Step 7: Animating the Characters (Lip-Sync)
With the visual characters and the audio generated, the final creative step is animating the hosts with realistic lip synchronization.
I utilized the InfiniteTalk model for this task, feeding it the scene image with the characters from Step 3 and the separated audio files from Step 6.
Just upload an audio file for each speaker, along with their corresponding image, to the workflow. The model will then generate a lip-synced video.
Here is the prompt:
A man and a woman are talking to each other.
Example of the animation:

The generation time for each one-minute segment was about 60 minutes on my AMD Radeon AI PRO R9700.
Step 8: Assembling the Final Production
The last stage is combining all the assets we generated into a cohesive whole.
I used the open-source video editor Kdenlive to assemble the project:
- Stitching Segments: Combining the five animated segments.
- Transitions: Adding the 3-second B-rolls between the main discussion segments.
- Final Touches: Adding the animated intro clip and the dim-lit outro scene with credits.
- Audio Sync: Integrating the intro/outro music and B-roll audio.

You can download the full Kdenlive project, along with all the assets and ComfyUI workflows, here on my GitHub: meefik/humanless-podcast.
Conclusion
This project demonstrates that creating a complete, high-quality AI-generated media asset is absolutely possible using only open-source, self-hosted AI models and tools. It’s not an one-click solution, and the quality still requires a creative human touch, but the cost is only your time and the computational power of your local machine.
It was an exciting journey pushing the boundaries of what local AI can achieve. I hope this inspires you to explore similar projects and experiment with the incredible capabilities of open-source AI. The “Humanless Podcast” is a testament to the power of local AI—and I encourage you to try to create your own!
Comments